zero gas required
per Vulture
vs. small units
total resource cost
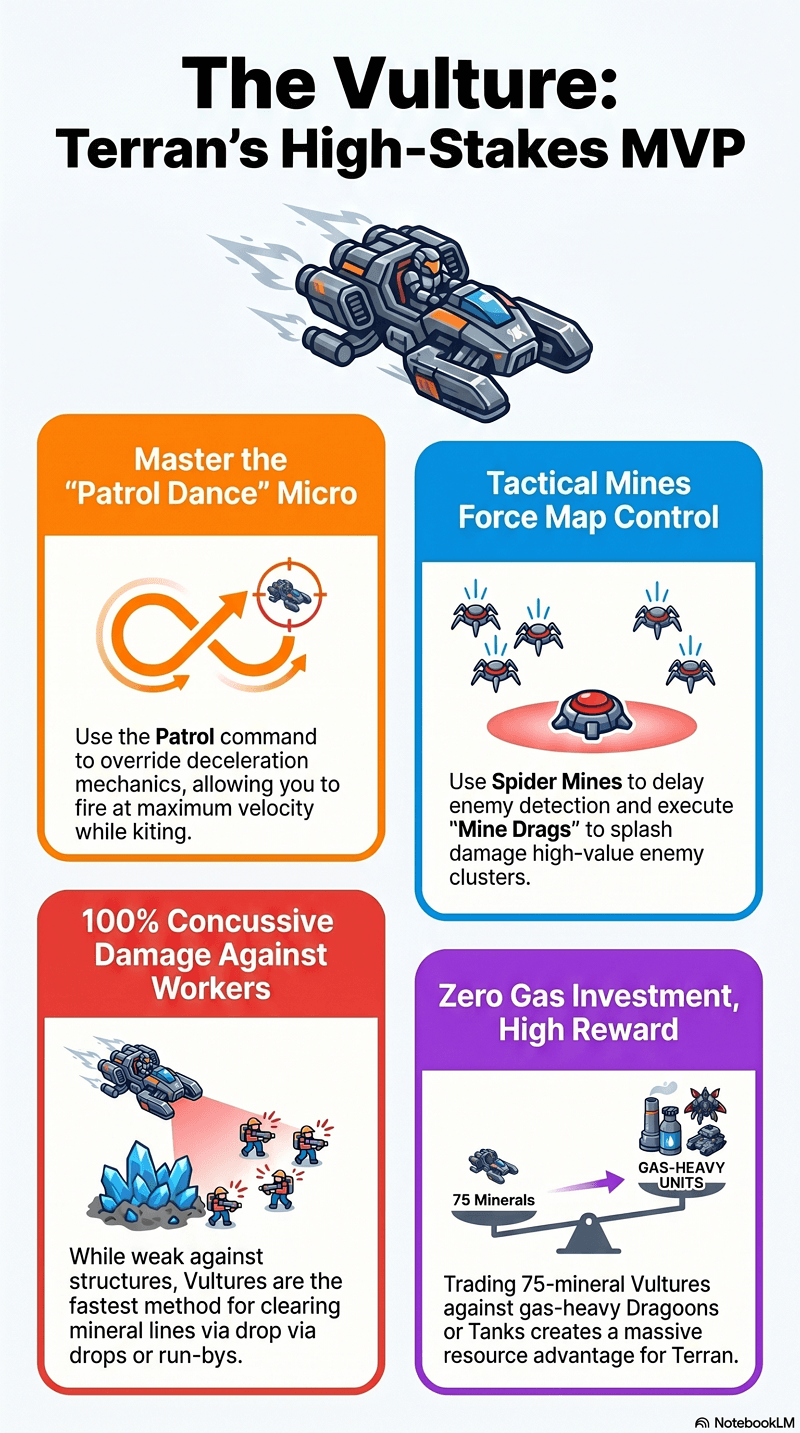
In StarCraft: BroodWar, the Vulture is far more than a scouting unit. It is a high-skill-cap tool that dictates the tempo of the entire match. For only 75 minerals and zero gas, the Vulture delivers an unrivaled resource exchange against substantially more expensive gas-intensive compositions — Dragoons, Tanks, Lurker-ling swarms. Mastering the Vulture marks the definitive jump from basic unit management to complete map dominance.
Its value comes from three distinct dimensions of utility: surgical kiting through the Patrol Dance, strategic map control via Spider Mines, and swift economic destruction of worker lines. Each dimension is a skill floor that separates the casual Terran from a genuine threat.
The Strategic Core: A 75-Mineral Force Multiplier
The Vulture's defining characteristic is its cost-to-impact ratio. Every Dragoon the Protoss builds costs 125 minerals and 50 gas. Every Siege Tank you lose is 150 minerals and 100 gas. A Vulture costs 75 minerals and nothing else. Trading Vultures against those units is an economic win by definition — provided your Vultures are doing useful work before they die.
The Vulture's power comes not from raw combat strength but from asymmetric resource exchange. Trading 75-mineral Vultures against 175-mineral Dragoons or 250-mineral Tanks creates a compounding advantage. Each trade shifts the gas-mineral balance in your favor, freeing your economy to invest in heavier tech while your opponent replaces units.
This is why gosu Terran players keep a constant stream of Vultures rolling out of their Factories in every matchup. They are not just scouts or harassment — they are resource leverage made physical. Understanding this framing changes how you use them: every Vulture should be on a mission, not wandering the map.
"A Vulture sitting idle is a missed opportunity. A Vulture with a mission is a ticking clock on the opponent's economy."
The "Patrol Dance": Mastering Combat Micro
Technical execution of Vulture movement is what separates top-tier Terran play from average. While a standard Attack-move command forces a unit to stop, fire, then restart — triggering a full deceleration animation each time — the Patrol (P) command overrides this behavior entirely.
The Patrol command lets a player "dance" around slow melee forces like Zealots and Zerglings. By issuing Patrol commands in rapid succession, the Vulture fires at maximum velocity without the stop-start pause. This is the foundation of the Patrol Dance.
The Patrol Dance requires muscle memory, not just knowledge. Drill it in custom games against Zealots at a choke point until the rhythm of issuing Patrol commands becomes automatic. A player who thinks about the mechanic while executing it will always be too slow. The goal is to make it as instinctive as using a hotkey.
Against Zerglings the margin for error is even smaller — Zerglings are fast enough that a single mistimed Patrol command lets the pack close the gap and swarm the Vulture. Consistent Patrol Dance execution is the skill that unlocks every other Vulture strength in this article. Get this right first.
Spider Mines: More Than Just Explosives
The Spider Mine is the strategic heart of the Vulture. Beyond simple area denial, mines serve as a multi-functional tool for intelligence, psychological pressure, and tactical disruption. Understanding all three functions transforms how you deploy them.
Vision and the Observatory Delay (TvP)
In TvP, mines provide a unique psychological advantage that most players underestimate. If a Protoss player opens with a greedy Nexus-first build, they are often forced into an Observatory Delay — they simply cannot afford the gas for both the Nexus and early detection.
By laying mines early at the entrance of the Protoss Natural Expansion, you force the opponent to play blind and slow. Without the detection needed to clear the field safely, they cannot expand their army freely, cannot push, and cannot Scout your build — all while you read their entire economy through their response. Every second a Protoss delays their Observer is a second they are not pressuring your base.
Map Control and Area Denial
Mines limit development paths and force opponents to spend resources on detection or risk slow, tedious defusing. On terrain with bridges or high-ground ramps, manual defusing is particularly punishing because the opponent's units must approach the mine at an awkward angle while under potential fire from your army.
Place mines on high ground and chokepoints. This forces opponents to defuse using units like Dragoons, which often fail unless executed precisely. A Dragoon attempting to defuse a mine on a ramp under Vulture fire is a Dragoon that is dying for free. Be aware that elite players can use Hold Position micromanagement to defuse mines from range without triggering them — this is the counter-play you need to respect at higher levels.
The Splash Damage "Mine Drag"
The Mine Drag is an advanced technique where a player guides a triggered mine into the opponent's own army or worker lines. Because mines produce significant splash damage, a skilled player can use the opponent's movement to direct the explosion into high-value, concentrated targets — particularly effective against tightly grouped Zealots or Zerglings charging into your base.
- TvT Mine Drag: In mirror matches, prioritize dragging mines into high-value mechanical units like Tanks or Goliaths. Placing mines slightly overlapping increases the chance of chain detonations that devastate clustered units.
- TvP Worker Drag: A triggered mine near a Probe line that has not been defused can be walked through the mineral workers — the splash kills half a dozen Probes in one explosion.
- TvZ Chain Detonation: Against Zergling floods, cluster mines near chokepoints. A single mine triggering on the lead Zergling often chains into the pack behind it.
Economic Sabotage: The Worker Slayer
The Vulture is the ultimate specialist in economic destruction. Its weapon utilizes Concussive Damage, which deals 100% damage to "small" targets like workers but only 50% to large-type units and structures. While it struggles to take down buildings, it is the fastest method in the Terran arsenal for clearing a mineral line.
Concussive Damage deals full damage to small units (SCVs, Probes, Drones, Zerglings, Vultures) but only 50% to medium units and 25% to large units. This makes the Vulture extraordinarily efficient at killing workers — and nearly useless against structures. A Vulture in a mineral line will kill workers faster than almost any other unit in the game. A Vulture attacking a Bunker is a waste of time.
Terran players employ two primary methods to get Vultures into the opponent's economy:
- The Vulture Drop: Aerial infiltration via Dropships bypasses front-line defenses entirely and lands directly behind the mineral line. Combining a Dropship with 2–3 Vultures is one of the most efficient harassment packages in the game — the Dropship absorbs anti-air fire while the Vultures shred workers.
- The Run-By: Using the Vulture's superior speed to exploit a gap in the opponent's wall or defensive spread. Even a brief 10-second run-by that kills 6–8 workers deals economic damage that compounds for the rest of the game.
Eliminating a dozen Probes or Drones does not just set the opponent back by their mineral value — it delays every future resource they would have gathered. In BroodWar, a worker killed in minute 5 represents not just 50 minerals lost, but hundreds of minerals in foregone mining over the next 10 minutes. This is why experienced players react so aggressively to worker harassment: the damage is non-linear.
Vulture-Centric Openings and Defensive Utility
The Vulture is a staple across all matchups, providing versatility from the opening minutes through the late-game transition. Understanding when to build Vultures — and when to pivot away — is a core part of Terran macro decision-making.
The 3 Factory Vulture Opening
A common and highly effective progression is the 3 Factory Vulture opening. This setup gives you enough Vulture production to dominate the map in the early game while you prepare the infrastructure for a heavier transition.
Gaining map control with this setup allows the Terran to safely transition into heavy Tank/Goliath compositions or execute a timing attack against an economy that was disrupted by early mine placement and run-bys.
Defensive Utility: Countering Dark Templar and Reaver Drops
Vultures with Spider Mines are essential for defensive stability in TvP. They are the primary counter to Dark Templar rushes and Reaver drops — two of the most punishing tech choices a Protoss can make against an unsuspecting Terran.
- Against Dark Templars: Position your first Spider Mines near your own chokepoint to intercept cloaked units before they can enter the base. The DT will trigger the mine while it is still outside your mineral line — buying you enough time for a Scan or Comsat sweep.
- Against Reavers: Place mines at the most likely Dropship landing zones within your mineral lines. Be cautious — elite players can sometimes drag your own mines into your worker line using a Reaver-Shuttle pickup maneuver. Keep mines slightly further back to prevent this.
At higher levels of play, opponents use Hold-Position micromanagement on Dragoons to defuse mines from range without triggering them. A Dragoon on Hold-Position will not chase the mine's "crawl" animation — it stays put and fires from maximum range, defusing the mine safely. This is the technical counter to your mine placement. Respond by placing mines in positions where the Dragoon cannot get the necessary angle without exposing itself to your Vultures.
Conclusion: The Cost-Effectiveness King
The Vulture remains the peak of Terran mobility because no other unit offers such transformative value at such a low mineral cost. It provides speed, map intelligence through mines, and the capacity to win games through economic harassment — all without touching your gas reserves.
By progressing beyond basic kiting and learning the nuances of the Patrol Dance and Mine Dragging, a player can upgrade the Vulture from a simple scout to a tool of total strategic control. In the hands of a skilled player, the Vulture does more than merely respond to the enemy — it dictates the terms of the conflict.
The Vulture's power is not in the unit itself — it is in the decisions it forces your opponent to make. Every mine placed is a question the opponent must answer. Every run-by is a crisis they must manage. Every Patrol Dance is a calculation they must lose. Master the Vulture and you master the tempo of the match. The opponent reacts to you — never the other way around.